Imagine being able to listen in on your scanner from any location with internet access, or “on the go” on your mobile device.
This page explains how you can turn your scanner into a web radio, for online broadcast.
Scanner receiver

Since we will be picking up more than just one frequency, it will be good to know which that frequency is. We need some way to communicate with the scanner, that’s why the serial port is very useful.
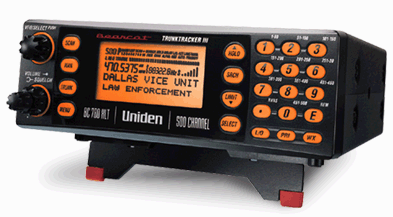
Needless to say that for this setup to work you need a scanner with some kind of connector to the outside world. In this page I show you how take advantage of the serial port on the back of the UBC780 Uniden scanner to extract frequency information and pass it to the streaming server and ultimately the client. You could of course ignore all the serial communication related stuff and just stick to the pure audio broadcast. In that case keep on reading…
Hardware
Raspberry
I used a Raspberry 4 (4GB), but I believe you can use any Raspberry for the job as no graphical user interface is needed for any of the software used below.
USB Soundcard
On my setup the USB soundcard used is the Lexicon Alpha, a device marketed for musicians. Any USB soundcard that is supported under Linux should work in theory.
serial cable (optional)
If you happen to have a UBC780 lying around (its unlikely this will work on other scanners) then you can consider this step as well. There are two “streaming setups” A & B depending on the way you want to establish serial communication with the scanner.
- USB to serial cable (scroll down to see a sketch option A)
- MAX3232 board + straight serial cable. (option B)
Software
For audio streaming you normally need two things. A streaming server and a streamer.
Icecast2 – streaming server. Delivers and manages the content from the streamer.
DarkIce – a live audio streamer. It records audio from an audio interface (e.g. sound card), encodes it and delivers it to a streaming server.
darkice
First we need a streamer. An audio streamer like darkice has to be able to access the soundcard, encode the audio stream to the desired format (encoding format, rate, channels etc) and pass it to the streaming server.
sudo apt-get install darkiceIn the /etc/darkice.cfg configuration file you will need to tell darkice where the incoming audio is, how you want to encode it, where the streaming server is, and other information describing your stream.
The tricky part in all of this will be to determine the value of the “device” parameter. I managed to find mine with a bit of experimentation.
The command: aplay –list-devices returned the following output. In it you can see that the soundcard I hooked up called “Lexicon Alpha” has been assigned device “card 1”. We will use this information later for our darkice.cfg file for the device parameter.
**** List of PLAYBACK Hardware Devices ****
card 0: Headphones [bcm2835 Headphones], device 0: bcm2835 Headphones [bcm2835 Headphones]
  Subdevices: 8/8
  Subdevice #0: subdevice #0
  Subdevice #1: subdevice #1
  Subdevice #2: subdevice #2
  Subdevice #3: subdevice #3
  Subdevice #4: subdevice #4
  Subdevice #5: subdevice #5
  Subdevice #6: subdevice #6
  Subdevice #7: subdevice #7
card 1: Alpha [Lexicon Alpha], device 0: USB Audio [USB Audio]
  Subdevices: 1/1
  Subdevice #0: subdevice #0
card 2: vc4hdmi0 [vc4-hdmi-0], device 0: MAI PCM i2s-hifi-0 [MAI PCM i2s-hifi-0]
  Subdevices: 1/1
  Subdevice #0: subdevice #0
card 3: vc4hdmi1 [vc4-hdmi-1], device 0: MAI PCM i2s-hifi-0 [MAI PCM i2s-hifi-0]
  Subdevices: 1/1
  Subdevice #0: subdevice #0
Below is an example of my darkice.cfg configuration file:
[general]
duration    = 0    #encoding, in seconds. 0 means forever
bufferSecs  = 5    #buffer, in seconds
reconnect   = yes  # reconnect if disconnected
realtime    = yes  # run the encoder with POSIX realtime prio
#rtprio     = 3    # scheduling prio for the realtime threads

# this section describes the audio input that will be streamed
[input]
device      = hw:1,0   #soundcard device for the audio input
sampleRate  = 44100    # sample rate, try 11025, 22050 or 44100
bitsPerSample = 16   # bits per sample. try 16
channel     = 2    # channels. 1 = mono, 2 = stereo

# streaming connection to an IceCast2 server
# up to 8 of these sections [icecast2-0] ... [icecast2-7]

[icecast2-0]
bitrateMode     = cbr    # average bit rate
format          = mp3    # format of the stream: ogg vorbis
bitrate         = 64     # bitrate sent to the server
server          = 127.0.0.1   # host name of the server
port            = 8000        # port of the IceCast2 server
password        = hackme
mountPoint      = live     # mount point on the IceCast2 server
name            = geraki   # name of the stream
description     = live scanner feed   # description of stream
url             = http://www.tekmanoid.com
genre           = scanner   # genre of the stream
public          = no        # advertise this stream?
#localDumpFile  = dump.mp3  # local dump file
icecast2
Lets install the IceCast2 streaming server
sudo apt-get install icecastThe server needs some configuration too of course, but its actually much simpler to setup than darkice and basically works out of the box. The configuration file is normally found under /etc/icecast/icecast.xml
You will just have to input the admin password for IceCast’s web interface, the server listening port, the credentials needed for audio streamers, max clients to serve etc.
Serial configuration “A”: USB serial cable

Preferably one with the PL2303 chip. It should be recognized immediately by the system. Doing lsusb on my Raspberry displays the cable as such:
Prolific Technology, Inc. PL2303 Serial PortSerial configuration “B”: MAX3232 level shifter

The Raspberry already exposes UART pins on the GPIO interface. These pins need an additional circuit though to adjust the voltage levels from the 3.3V TTL levels to the COM port levels. The MAX3232 chip does just that. This chip is the 3.3V equivalent of the more popular MAX232 for 5V applications.
Keep in mind when hooking up the board (that is sold separatly) that you will have to flip the connections between RXD and TXD lines (see the sketch)
One extra advantage of using this configuration is that you get back the USB port that was lost due to the USB cable.
serproxy or ser2net
This tiny program/daemon exposes the serial communication port to a socket. In most programming languages talking to a serial port is a little trickier than opening a socket for exchanging data. And there lies the strength of this little tool. It takes care of that for us. Beware that in older distributions this program goes under the name serproxy.
python script
If you are interested in sending frequency information to the client then keep reading, otherwise you can skip this part.
A very useful feature of this particular scanner is its ability to inform us whenever the squelch is broken. This will save us from having to poll the radio during regular intervals! Our python script will threfore be event triggered by the scanner itself. Current frequency will then be passed to Icecast’s server in the form of metadata. Streaming players (not all) normally extract this metadata to display the currently playing artist & song title. We will instead send channel & frequency!
This is a custom script which will do the following things. It will send the QUN command to the scanner on startup. This will tell the scanner that we want to be informed whenever the squelch breaks. When the scanner stops on a broadcast (or simply the squelch breaks) we will receive the “+” character. (When the audio stops the scanner sends “-“, but we won’t use this).
Upon reception of this “+” character we know the scanner has stopped on a transmission. We will then ask what the current frequency is by sending a “MA” command. The scanner will then reply with a string similar to:
C100 F01215000 TF DN LF AF RF N000
The script will extract channel and frequency information from the received reply and pass it to the streaming server through one of its APIs for updating “song/artist” information about the currently playing “track”.
#!/usr/bin/env python3

# Python3 script to feed IceCast2 server metadata
# with info from UBC780 Uniden scanner from serial port.
# Needs serproxy or ser2net to connect to
# serialport through socket (here on port 2000)
# www.tekmanoid.com
# Author: Alex Scafidas
# corrections/updates/comments: alex.scafidas@gmail.com
# v1.1

import socket
import errno
import sys
import time
import requests
import signal

#example reply from uniden scanner: C123 F01505000 TF DN LF AF RF N000
def MAtoFreq(title):
    if title.startswith("C"):
        frequency_str = title[6:14]
        freq_float= float(frequency_str)/10000
        return "%.4f" % freq_float + " MHz"

def MAtoCH(title):
    if title.startswith("C"):
        channel_str = title[1:4]
        return "CH " + channel_str

def CHandFRQ(response):
    freq = MAtoFreq(response)
    chan = MAtoCH(response)
    if chan and freq:
        return chan + " - " + freq      #some players use this char to split b/n artist and song
    else:
        return "None"

def sendtoicecast(title):
    print("updating metadata with : "+title)
    r = requests.get("http://127.0.0.1:8000/admin/metadata.xsl?song="+str(title)+"&mount=/live&mode=updinfo&charset=UTF-8", auth=('admin', 'hackme'))
    #print r.status_code
    return

def handler(signum, frame):
    print("\nClosing serial port")
    sock.send(b'QUF\r') #cleanup. de-activate broken squelch reports
    time.sleep(0.5)
    sock.close()
    sys.exit(1)

#main...
server_address = ('localhost', 2000)    #whatever you configured in ser2net/serproxy
sock = socket.socket(socket.AF_INET, socket.SOCK_STREAM)

try:
    print('connecting to %s port %s' % server_address)
    sock.connect(server_address)
except socket.error as msg:
    print("Unable to connect: %s\n terminating program" % msg)
    sys.exit(1)

sock.send(b'QUN\r')                      #activate broken squelch reports - not supported by all scanners
serialdata = bytearray(b'')
lastserialdata = bytearray(b'OK\r')      #first reply to QUN command
signal.signal(signal.SIGINT, handler)    #listen out for Ctrl-C

#loop forever
while True:
    try:
        data = sock.recv(64)
    except socket.error as e:
        print("error detected")
        err = e.args[0]
        if err == errno.EAGAIN or err == errno.EWOULDBLOCK:
            time.sleep(1)
            print("no data available")
            continue
        else:
            print(e)
            sys.exit(1)
    else:
        if data.startswith(b'+\r'):
            time.sleep(0.2)
            serialdata = bytearray(b'')
            sock.send(b'MA\r')
        elif data.startswith(b'-\r'):
            serialdata = bytearray(b'')
        elif data.startswith(b'NG\r'):
            serialdata = bytearray(b'')
        elif b'\r' not in data:
            serialdata += data
        elif data.endswith(b'\r'):
            serialdata += data
            if ( lastserialdata != serialdata ):
                lastserialdata = serialdata
                sendtoicecast(CHandFRQ(serialdata.decode()))
                serialdata = bytearray(b'')
screen
Another useful tool in Linux in general is “screen” which allows you to run tasks that write to the console and still allowing you to continue to use the console/terminal. You can detach and reattach to a running terminal session. The above python script for example could be run in such manner. An advantage is that in case of failure you can connect to the terminal (by name or PID) and see what caused the crash.
Client
For your first attempt to connect to the stream you just setup you should try with the local address. To listen to your stream you can use any client that supports playing online streams. So you can use VLC and select “Open stream” (CTRL+N) and enter the streaming URL in the format:
http://192.168.1.xx:8000/live
In the above example, 8000 is the listening port of the IceCast server and “live” is the mountpoint which tells it which stream we are interested in.
windows
- VLC
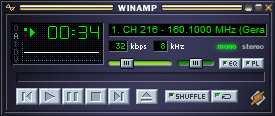
- Winamp

linux
- VLC
android
- ServeStream
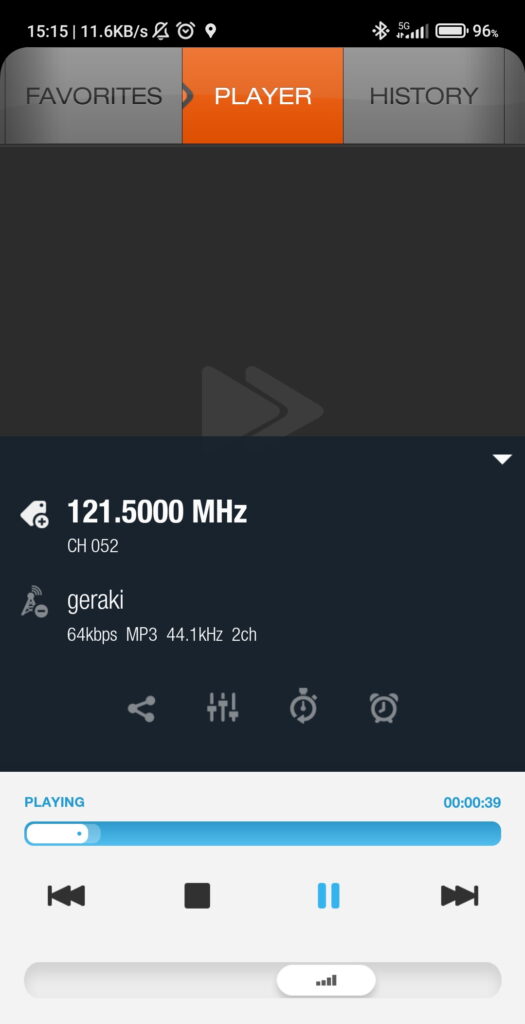
- XiiaLive (below)

Extra considerations
DNS
If your run this setup from your home, you will most likely have a dynamic IP, so you will have to register on some free DNS service and map this dynamic IP to a static hostname. Sometimes there is built-in support for this in home routers too. Otherwise you will need to add a small daemon in the Raspberry that sends periodic updates to the DNS server. You could for example use ddclient which is a deamon program used to update DNS entries whenever it detects a change in the assigned public IP.
listening behind a proxy
If you plan to connect with your client from a corporate environment you will most likely be sitting behind a proxy. You will have to add this configuration to the client you are planning to use.
port forwarding
As with any other service running in your LAN, if you want to expose it to the outside world, you will need to do the necessary port-forwarding on your router. If you use the defaults, this would be port 8000 for IceCast. You could also use online tools that check for open ports.
now the proxy IP address and configure this in the client player’s configuration.
finetuning
Run alsamixer to set the microphone levels to an adequate amount around 30% on my system and with the “autogain” set to disabled (press M)